So You Want To Create WordPress Themes, Huh? This can be a quite challenging job. As Ian Stewart wrote on his post, modern themes needs a lot of features to be real good ones. But working on a Framework Theme, as Thematic or Hybrid, can be a valid solution to build a customized WordPress theme without having to deal with PHP and other tech specs.
You just need to handle CSS to style your child theme.
In this tutorial you will learn how to start your own theme in just few hours of works. I will show you step by step how I’ve built a simple child theme based on Thematic Framework Theme.
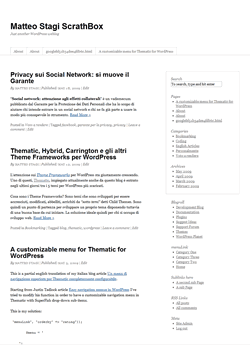
The starting point: Theme Framework
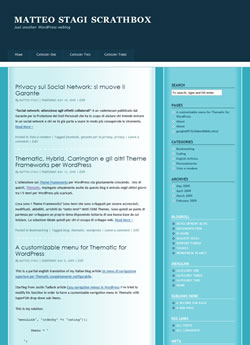
The result: a child theme
Tools and skill required
At this level you don’t need any PHP experience. You just need:
- some basic CSS know-how
- a CSS editor (windows notepad is OK too)
- Firebug extension for Firefox, to inspect the code and to help you to test your personal changes to it.
Make ready for your Child Theme
- download the Thematic Theme from WordPress theme repository
- upload the unzipped folder to your
htdocs/wp-content/themeson your blog server - create a folder on your computer. Give the folder the name of your child theme. For istance I’ve created a “3hoursTheme” folder.
- create a new empty CSS file called style.css
- add the following code to the beginning of your new style.css file:
/* Theme Name: 3hoursTheme Theme URI: http://www.matteostagi.it/eng/fast-develop-wordpress-theme-tutorial-1 Description: Just an other Thematic Child Theme Author: Matteo Stagi Author URI: http://www.matteostagi.it/ Template: thematic Version: 0.1 . This work is released under the GNU General Public License 2: http://www.gnu.org/licenses/old-licenses/gpl-2.0.html . */ /* Reset browser defaults */ @import url('../thematic/library/styles/reset.css'); /* Apply basic typography styles */ @import url('../thematic/library/styles/typography.css'); /* Apply a basic layout */ @import url('../thematic/library/layouts/2c-r-fixed.css'); /* Apply basic image styles */ @import url('../thematic/library/styles/images.css'); /* Apply default theme styles and colors */ @import url('../thematic/library/styles/default.css'); /* Prepare theme for plugins */ @import url('../thematic/library/styles/plugins.css'); - save style.css in the folder you created
- upload the folder to
htdocs/wp-content/themeson your blog server
Let’s start to shape our theme
If you have done correctly the above step you will find two new themes on Appearance -> Themes of your WordPress administration area. One is Thematic, the other is our
3hoursTheme. Select and activate the 3hoursTheme.
At this moment the 3hoursTheme is identical to the Thematic parent theme. But without touching any line of code of Thematic theme we will be able to shape a new child theme that inherit everything from the parent one except for the redifined styles.
Let’s start by changing the basic font style and applying a background color to the whole page.
Open again style.css and add this code:
/* re-define base font-face and size */
body, input, textarea {
font-family:"Trebuchet MS", Verdana, Arial, Helvetica, sans-serif;
font-size:13px;
}
/* apply a background color to the whole page */
body {
background-color: #33ACBD;
}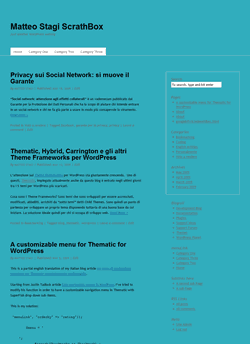 What have we done? We have changed the font-face for the whole page (since
 body is the parent tag for the whole xhtml page). That doesn’t mean we will have only Trebuchet MS fonts on our page, because we can later define a more specific style (i.e. for headers) that will overrides the default style applied to body. We have changed the background color for the page, too.
Ok. Save it. And upload again to your blog server.
Refresh your blog page and the result should be as the image here on the left.
Now we want to add a background image to our content area. I’ve created this image with Adobe Fireworks: it’s 960 pixel wide, the same width of the content area of Thematic Theme. I saved it as mainBkgrnd.jpg in a subfolder of 3HoursTheme folder that I’ve called “images”.
We add the image to the content area:
/* apply a background image to the content area */
#main {
background-image: url(images/mainBkgrnd.jpg);
}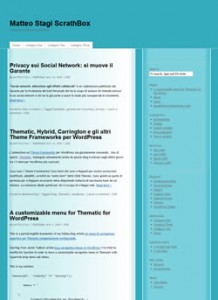 Upload the style.css and the image folder containg mainBkgrnd.jpg. Refresh your page to see the result. The image has been repeated on y-axis to the whole #main area of your blog.
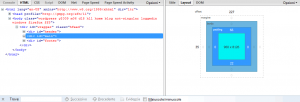
Firebug is the tool.
How do I know that the content area is called #main and it is 960 pixel wide?
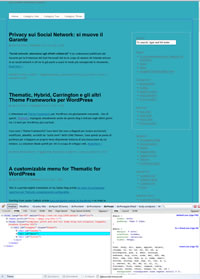
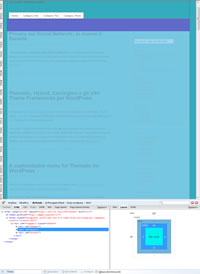
Use Firebug to inspect your blog page and to find #id names and layout dimensions for the areas of your blog.
More on Firebug can be read on 10 Reasons Why You Should Be Using Firebug.
Continue…
In the next part of the tutorial we will shape the header, the footer, the menu, the widget areas. You will be able to download the full code of my 3hoursTheme but I suggest you to build it on your own so you will be able to better understand how to modify your child theme and to apply custom changes to my code.
Continue on part II – how to style header, footer and posts.
 Vediamo come creare la nostra home page usando un layout a tre colonne fisse e tutte le altre pagine usandone uno a due colonne usando Thematic....
9 Commenti
I’ve been searching for this for a long time.
Thanks for this serie of post. I’m going to try it as soon as possible in order to forget my actual default them.
Matteo,
I have spent days looking at every Thematic Child theme tutorial there is. You have done the best job of any. And you included images to compare to what we have done. WELL DONE
Jim
Sorry, forgot one thing. How do you determine on the background image where the different colors will be. Hope this is clear. Do you style the DIV’s 1st and then make the image or vise versa.
Thanks Jim, I’m glad you find my tutorial useful.
For styling background image I usually take a screenshot of my blog. I open it with Fireworks and I apply an image layer over it to see the effect. Pixel Perfect (http://www.pixelperfectplugin.com/) is a really good extension for Firefox / Firebug that allows you to add an image overlay to web pages. It can be very useful for this purpose.
I am new to WordPress and found you post very helpful. I have implemented many of you techniques. Of course tweaking them to make them my own.
Thanks!
ciao Matteo, ma in italiano il tutorial non c’è? scusa se non l’ho trovato! o non c’è proprio? ma non penso, tu sei italiano vero?
ciao!
Alcina, si sono italiano. Ma il tutorial per ora l’ho scritto solo in inglese visto il numero ancora esiguo di utenti di Thematic in Italia. Se ci sarà richiesta provvederò a tradurre il tutorial. Comunque se scarichi il child theme troverai il codice commentato da brevi righe di testo e penso sia abbastanza comprensibile anche da chi non conosce bene l’inglese.
Grazie della tua visita al mio blog.
Grazie anche a un anno di distanza l’esempio fornito è abbastanza semplice e chiaro.
Ne beneficeranno http://www.fiaf-veneto.it lnx.athesis77.it e altri siti in wp che sto personalizzando, ancora grazie. Fai presente che la scelta di un tema con combinazioni di colori può comportare l’inutilità di inserire le modifiche nel template style.css, ma con firefox si può stabilire qual’è il persorso e nome file css da realizzare oltre a style.css.
Ciao Matteo, e complimenti per il tutorial!
Mi è stato di enorme utilità, soprattutto perchè ho finalmente capito il concetto delle body classes.
Sono circa un paio di mesi che sto studiando WordPress per utilizzarlo su alcuni siti ai quali sto lavorando, e nonostante avessi letto molto materiale in rete ed un libro specialistico su WP non avevo ancora chiaro questo punto.
Grazie!