Voto a rendere

Una settimana su Twitter

Ultimamente uso con una certa frequenza Twitter. Lo trovo molto utile per condividire le informazioni e notizie più interessanti che trovo in rete.

Twitter è un’ottima fonte di informazione. Scegliendo con cura le persone da seguire possiamo essere sempre aggiornati sulle notizie più fresche che ci interessano. E condividerle a nostra volta.

twitter_logo

Posto quindi su questo blog i contenuti dei miei tweet di questa settimana con le risorse / informazioni che ho ritenuto più interessanti. Non è tutta farina del mio sacco: molti sono re-tweet (RT) ovvero ho semplicemente rilanciato notizie e risorse che a mia volta avevo appreso dalla persone che seguo su Twitter.

Iran

FriendFeed bloccato in Iran
RT @btaylor FriendFeed has been almost completely blocked in Iran as far as we can tell…Graph below….
http://friendfeed.com/bret/01d7ad79/friendfeed-has-been-almost-completely-blocked

Analisi e confronto del ruolo di  Twitter e media tradizionali nell’informazione
Clay Shirky on Twitter and Iran: Traditional media can’t do more than make us sympathize. Twitter makes us empathize.
http://blog.ted.com/2009/06/qa_with_clay_sh.php

Continua a leggere »

Termini collegati: , , , Commenti chiusi
English Articles

How to create your own WordPress Theme in just 3 hours – part II

This is the second part of a tutorial on shaping a full featured WordPress theme without having to deal with PHP, mySQL and WordPress filters.

You can read the first part “Create a child theme based on Thematic Framework Theme” here

After adding a background image on our blog we have the post column (left one) too near to the border of the image. We know that column name is #content by inspecting it with  Firebug. So we can fix it:

/* correct the margin to better fit the background image */
#content {
margin-left:30px;
}

Style Header and Footer

We want to change colors of header, footer and blog title.

/* apply the same background color to header and footer */
#header, #footer {
background-color: #113242;
}

Note that you can apply styles to more than one element. Color is applied to both header and footer. Now we continue by applying individual styles.

/* thick white borders to header and footer */
#header {
border-bottom:20px solid #FFF;
}
#footer {
border-top:10px solid #FFF;
margin-top:0px; /* remove the default top margin on footer */
}
/* thin borders on top and bottom borders of content area */
#main {
border-bottom:1px solid #4B8AA9;
border-top:1px solid #4B8AA9;
}

Blog Title is now using Arial (despite we applied Trebuchet MS to the body tag) because it is defined on default.css of Thematic parent theme (line 65). Verify this by inspecting blog title area using Firebug. This line of code, having more specificity, overrides our CSS rule.

We don’t want the page font face for our blog title, anyway. We want Georgia, uppercase.

/* re-define blog-title font-face */
#blog-title {
font-family:Georgia, "Times New Roman", Times, serif;
text-transform: uppercase;
}

/* let's expand a little the blog title with some letter-spacing and word-spacing */
#blog-title {
letter-spacing:0.04em;
word-spacing:0.1em;
}

Since body title is a link to blog home page we have to create a rule on the <a> tag in order to change blog title color. Any color applied to #blog-title woud be overridden by the <a> color definition.

/* blog-title color must be redifined inside <a> tag */
#blog-title a{
color: #FFFFFF;
}

We change also the color of blog description.

/* blog-title color must be redifined inside <a> tag */
#blog-title a{
color: #FFFFFF;
}

Save, upload and refresh to verify your work.
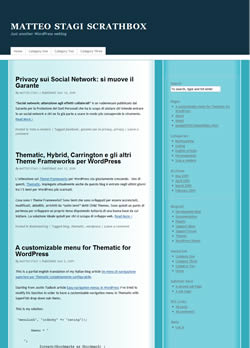
thematic_child_step3

Style the posts

Every single post (both full post and excerpt) are contained in a div tag. These divs have different IDs so we can’t apply a style to #post-1, #post-2, #post-99 and so on to shape them all. By inspecting the code we know that all the div have a .post class

/* add a border to separate posts */
div.post{
border-bottom:3px dashed #FFF;
}

We added a dashed line to separate posts. But the margins are wrong. Try to upload and check: it’s ugly.

There are two reasons:

  1. the div containg the post footer (div.entry-utility) has too much bottom margin
  2. there is no top margin on post title to separate it from the above line

We now fix both:

/* too much space between end of post and the border caused by the div.entry-utility margin: we clear the margin*/
div.entry-utility{
margin-bottom:0;
}
/* we add some top margin to .entry-title to separate them from the above borders*/
.entry-title{
margin-top:22px;
}
/* since we have added top margin to .entry-title we reduce a little the #main top padding */
#main {
padding-top:44px; /* default is 66px */
}

Save, upload and refresh. Cool! But we do not want the post borders on single post templates.
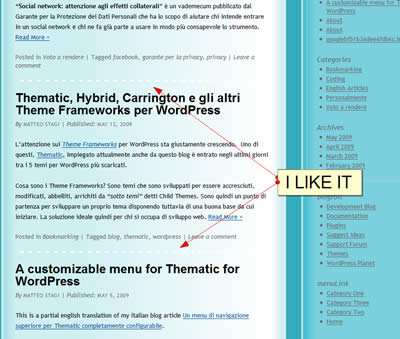
thematic_child_step4a

thematic_child_step4b

The body classes

Even in this case we do not need to modify the PHP template (single.php) to obtain a different aspect of single post pages. By using the body classes we can apply different CSS styles to each template.

Every WordPress page of Thematic theme has different multiple classes applied to the body tag. For istance the first part of the tutorial page has this classes applied to the body tag: wordpress y2009 m06 d19 h08 slug-how-to-create-your-own-wordpress-theme-in-just-3-hours-part-i single postid-532 s-y2009 s-m06 s-d18 s-h10 s-category-eng s-tag-child-theme s-tag-thematic s-tag-wordpress s-author-matteostagi  windows firefox ff3

Note the windows firefox ff3 classes that are dynamically created, based on my operating system and browser. That means we can different style a page for firefox 3 users just using CSS.

In our specic case we write

/* remove the border on sigle post pages */
body.single div.post{
border-bottom:none;
}

to remove the border from single post pages. Being a more specific rule it overwrite the previous one on pages containing single class on body tag.

Continue….

Learn to style the navigation and widget areas of your Thematic Child Theme. Move 1st subsidiary to header and put there your search box.

Part III – How to style navigation and widget areas of a Thematic Child Theme

Termini collegati: , , , Commenti chiusi
English Articles

How to create your own WordPress Theme in just 3 hours – part I

So You Want To Create WordPress Themes, Huh? This can be a quite challenging job. As Ian Stewart wrote on his post, modern themes needs a lot of features to be real good ones. But working on a Framework Theme, as Thematic or Hybrid, can be a valid solution to build a customized WordPress theme without having to deal with PHP and other tech specs.

You just need to handle CSS to style your child theme.

In this tutorial you will learn how to start your own theme in just few hours of works. I will show you step by step how I’ve built a simple child theme based on Thematic Framework Theme.

The starting point: Theme Framework

The starting point: Theme Framework

The result: a child theme

The result: a child theme

Tools and skill required

At this level you don’t need any PHP experience. You just need:

  • some basic CSS know-how
  • a CSS editor (windows notepad is OK too)
  • Firebug extension for Firefox, to inspect the code and to help you to test your personal changes to it.

Make ready for your Child Theme

  • download the Thematic Theme from WordPress theme repository
  • upload the unzipped folder to your htdocs/wp-content/themes on your blog server
  • create a folder on your computer. Give the folder the name of your child theme. For istance I’ve created a “3hoursTheme” folder.
  • create a new empty CSS file called style.css
  • add the following code to the beginning of your new style.css file:
    /*
    Theme Name: 3hoursTheme
    Theme URI: http://www.matteostagi.it/eng/fast-develop-wordpress-theme-tutorial-1
    Description: Just an other Thematic Child Theme
    Author: Matteo Stagi
    Author URI: http://www.matteostagi.it/
    Template: thematic
    Version: 0.1
    .
    This work is released under the GNU General Public License 2:
    http://www.gnu.org/licenses/old-licenses/gpl-2.0.html
    .
    */
    
    /* Reset browser defaults */
    @import url('../thematic/library/styles/reset.css');
    
    /* Apply basic typography styles */
    @import url('../thematic/library/styles/typography.css');
    
    /* Apply a basic layout */
    @import url('../thematic/library/layouts/2c-r-fixed.css');
    
    /* Apply basic image styles */
    @import url('../thematic/library/styles/images.css');
    
    /* Apply default theme styles and colors */
    @import url('../thematic/library/styles/default.css');
    
    /* Prepare theme for plugins */
    @import url('../thematic/library/styles/plugins.css');
    
  • save style.css in the folder you created
  • upload the folder to htdocs/wp-content/themes on your blog server

Let’s start to shape our theme

If you have done correctly the above step you will find two new themes on Appearance -> Themes of your WordPress administration area. One is Thematic, the other is our
3hoursTheme. Select and activate the 3hoursTheme.

At this moment the 3hoursTheme is identical to the Thematic parent theme.  But without touching any line of code of Thematic theme we will be able to shape a new child theme that inherit everything from the parent one except for the redifined styles.

Let’s start by changing the basic font style and applying a background color to the whole page.

Open again style.css and add this code:


/* re-define base font-face and size */
body, input, textarea {
	font-family:"Trebuchet MS", Verdana, Arial, Helvetica, sans-serif;
	font-size:13px;
}

/* apply a background color to the whole page */
body {
	background-color: #33ACBD;
}

thematic_child_sep1What have we done? We have changed the font-face for the whole page (since body is the parent tag for the whole xhtml page). That doesn’t mean we will have only Trebuchet MS fonts on our page, because we can later define a more specific style (i.e. for headers) that will overrides the default style applied to body. We have changed the background color for the page, too.
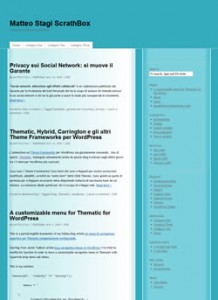
Ok. Save it. And upload again to your blog server.

Refresh your blog page and the result should be as the image here on the left.

Now we want to add a background image to our content area. I’ve created this image with  Adobe Fireworks:  it’s 960 pixel wide, the same width of the content area of Thematic Theme. I saved it as mainBkgrnd.jpg in a subfolder of 3HoursTheme folder that I’ve called “images”.

click on image to see it at full size

click on image to see it at full size

We add the image to the content area:

/* apply a background image to the content area */
#main {
	background-image: url(images/mainBkgrnd.jpg);
}

thematic_child_step2Upload the style.css and the image folder containg mainBkgrnd.jpg. Refresh your page to see the result. The image has been repeated on y-axis to the whole #main area of your blog.
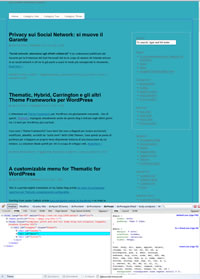
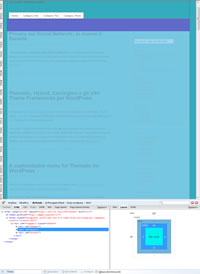
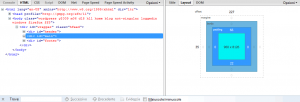
Firebug is the tool.


How do I know that the content area is called #main and it is 960 pixel wide?

thematic_child_inspect1thematic_child_inspect2
thematic_child_inspect3

click on image to see it at full size

Use Firebug to inspect your blog page and to find #id names and layout dimensions for the areas of your blog.

More on Firebug can be read on 10 Reasons Why You Should Be Using Firebug.

Continue…

In the next part of the tutorial we will shape the header, the footer, the menu, the widget areas. You will be able to download the full code of my 3hoursTheme but I suggest you to build it on your own so you will be able to better understand how to modify your child theme and to apply custom changes to my code.

Continue on part II – how to style header, footer and posts.

Termini collegati: , , , Commenti chiusi
Voto a rendere

Il caso Huffington Post sulle elezioni iraniane

Elezioni in Iran. Al momento in cui scrivo è ancora presto per capirci qualche cosa. Leggerò qualche editoriale di qualche buon giornalista domani per farmi una minima idea. Ma non sono un politologo.

Interessante per il mio mestiere è invece il caso del The Huffington Post : senza avere un ufficio internazionale è riuscito a essere uno dei giornali più sul pezzo e nella giornata di oggi ha ottenuto centinaia di migliaia di visite da parte di chi voleva documentarsi sui fatti iraniani.

huffington_iran_twitter-540x403

In che modo? Grazie tra l’altro a Twitter. Migliaia di tweet, i brevi messaggi di 140 caratteri, sono stati inviati in rete. Messaggi, in alcuni casi, inviati direttamente dall’Iran come nel caso del reporter danese http://twitter.com/rzbh.

I messaggi non contenevano solo testo ma rimandavano anche a fotografie e video presenti su youTube, creando un vero flusso di informazioni in presa diretta.

Il Huffington Post ha raccolto tutti questi messaggi, taggati #Iranelection su Twitter,  in una pagina del suo sito.

Per darvi una idea del traffico che si è è generato sul Huffington Post si guardino le statistiche di accesso alla sola home page del sito attraverso uno dei tanti servizi di url-shortening utilizzati per postare su twitter indirizzi di pagine web: http://bit.ly/info/106ng

Qualcuno ha scritto che oggi il giornalismo è cambiato. Non so se questa sia una affermazione eccessiva. Anche perchè questo immenso flusso libero di informazioni richiederà sempre qualche voce autorevole capace di indicare ciò che è vero da ciò che non lo è. E di analisi. E di opinioni.

Ad esempio: questo messaggio è stato inviato davvero da MirHossein Mousavi?

Sicuramente è un caso da seguire. Perchè alcuni meccanismi dell’informazione e della comunicazione stanno cambiando. Un pò come quella prima volta che vedemmo un reporter dalla CNN che trasmetteva da Bagdad mentre le bombe cadevano dal cielo.

Termini collegati: , , , Commenti chiusi
Altamente Decorativo

Come ottenere la versione piu' recente di Thematic via SVN

Wordle: svnSe abbiamo bisogno dell’ ultima versione disponibile di Thematic o semplicemente vogliamo testare le prossime funzionalita’, il modo per riuscirci e’ scaricare Thematic via SVN.
Continua a leggere »

Termini collegati: Commenti chiusi